Gear
Mamiya Six Automat I
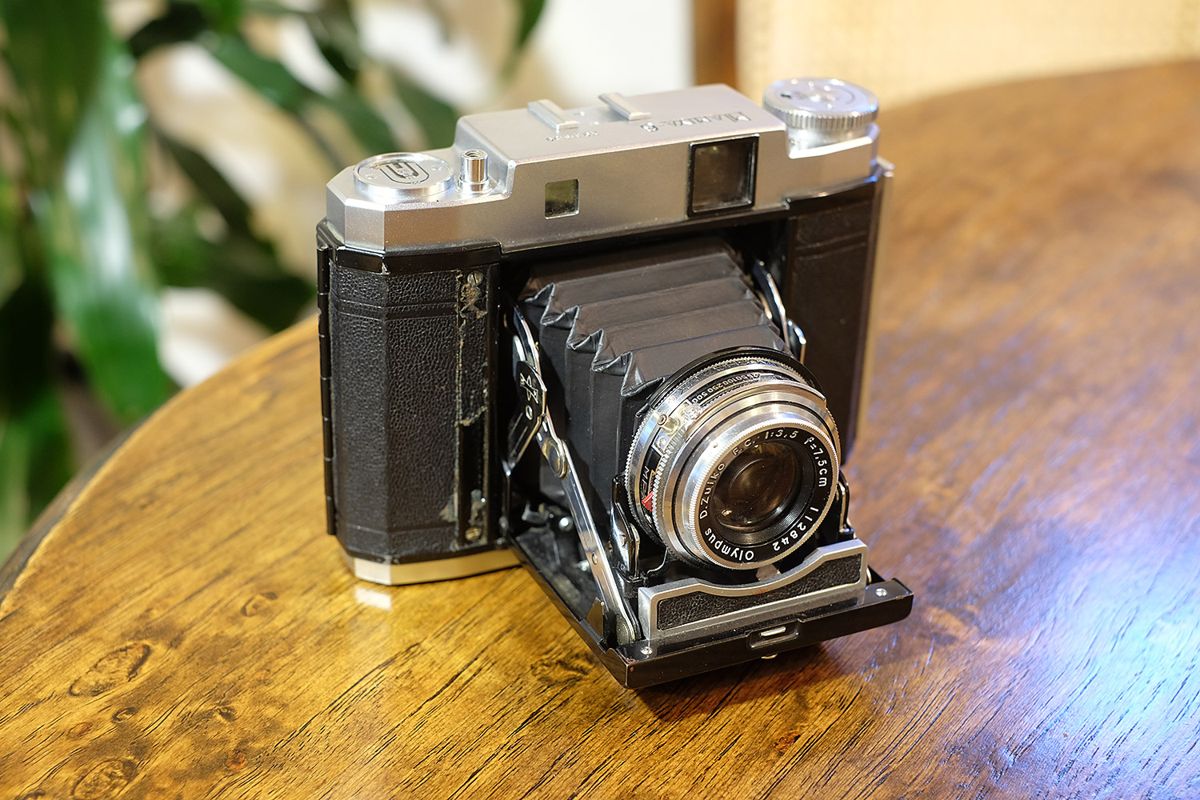
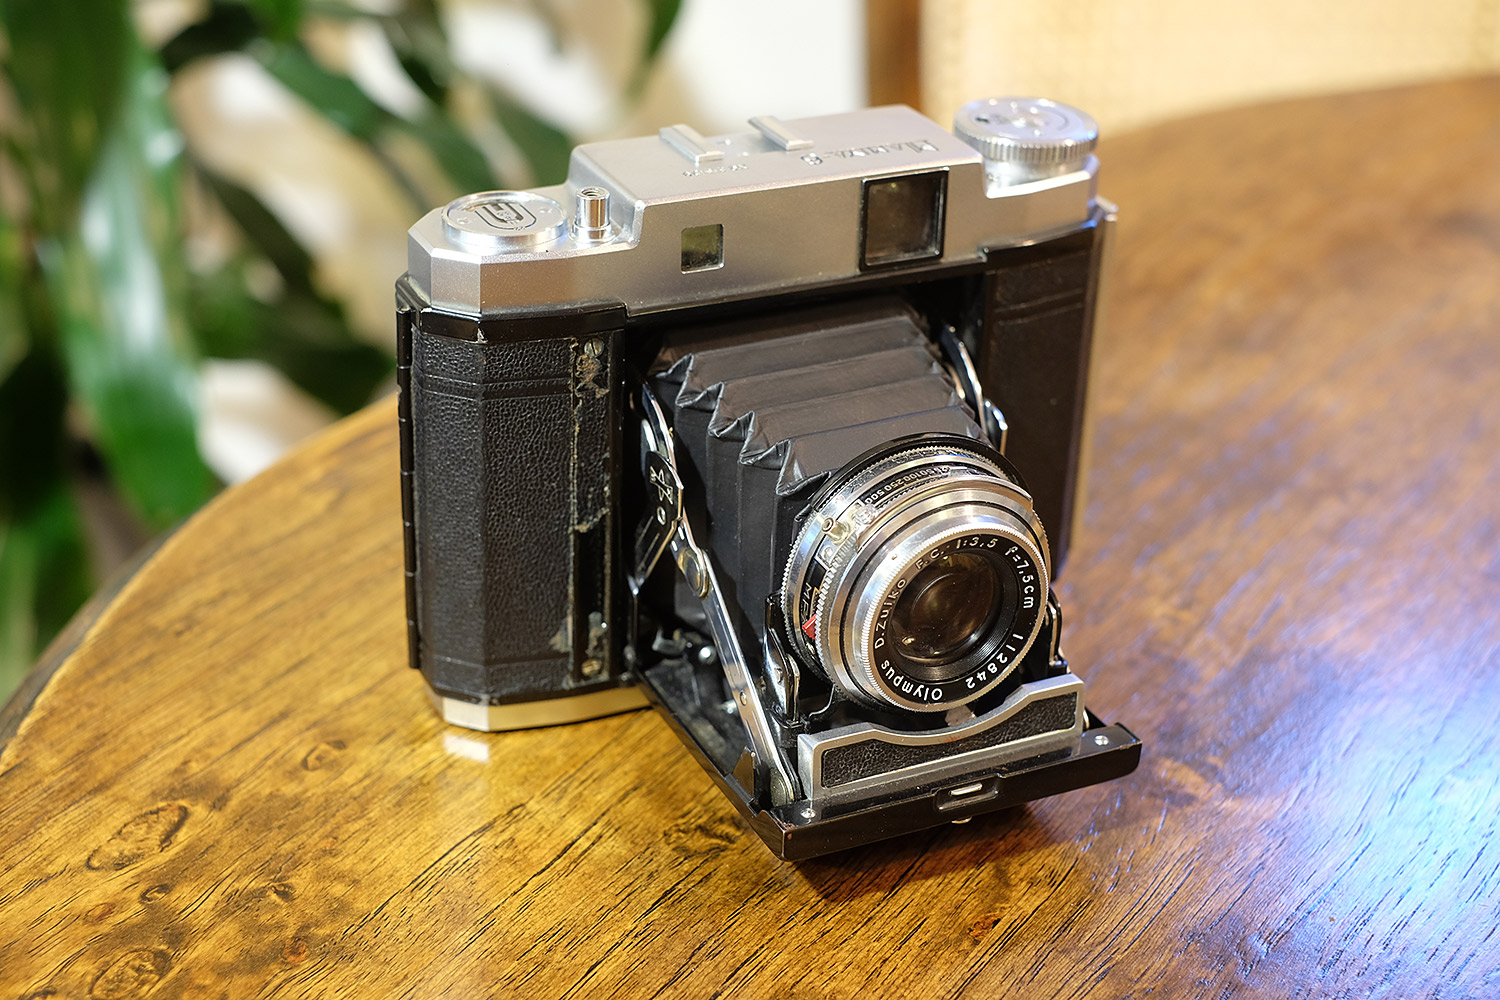
The Mamiya Six Automat is yet another addition to my medium format camera collection that I acquired in March 2017. A collection largely funded by my desire to not just break down and spend more than $1000 on some gear that I know is really nice. (Looking at you modern, interchangeable lens Mamiya 6)
The first medium format camera I ever owned was a Kodak Tourist II 6x9 folding camera. I only ran a handful of film through it before I stopped using it. I haven't had a folding camera since (if you don't count a baby Speed Graphic), but always have kind of wanted one. Still not wanting to spend $1800 for a Fuji GF670, I did some research on the vintage folding cameras and settled on the Mamiya Six Automat.
Strap Lugs
The Mamiya Six does not have any strap lugs on the body. Something I overlooked when I bought a camera without a case. Thus, I've been operating strapless for now. With the lens out, I'm not actually finding a good way to hold the camera in one hand while walking around. Might need to pick up one of Gordy's tripod wrist straps, or commission a custom half case if I can't turn up a vintage case to fit the camera. The neat part about not having the extra leather case on the camera though it that it even more easily fits in my coat pockets.
Also, I have already dropped it on my foot when I wasn't wearing shoes. I don't recommend doing that. It hurts like hell, and then your toe swells up and turns black and blue.
A Rangefinder!
I didn't like the Kodak Tourist II very much since there was no rangefinder in it. One of the big selling points on the Mamiya Six Automat is that it has a coupled rangefinder. The rangefinder itself turns out to be pretty decent as well. I'd say the rangefinder spot itself is compatible to the spot in the two Fuji GW690/GSW690 cameras that I have owned.
The neat thing about the focusing mechanism in the Automat is that instead of the lens moving back and forth, the focal plane and film move instead. I guess this makes it more reliable over time due to less complexity with moving the lens and having it fold into the body. The film plane focus also allows you to focus the camera while the lens in still in the body. Not sure what use that would be, but you can do it! Maybe if you wanted to clandestinely prefocus on something before you open the lens and strike later?
Bellows
Like all cameras of this age, the bellows are always a point of worry. The initial tests I did by popping a flash into them looked good. No pinholes! Ran a roll of film through the camera and it showed signs of light leaks. Tested it again and low and behold, a large pinhole had appeared. Instead of the typical acrylic paint/Elmer's glue mix that I've used in the past to repair bellows, I gave Liquid Electrical Tape a try. The initial application was promising. I let it set up and tested for leaks and found none. I opened and closed the camera a few times and checked again. Even more pinholes than when I started! I applied a second coat of the stuff and repeated this same cycle a few more times until I no longer had pinholes after opening and closing the camera few times.
Satisfied that I finally applied enough coats I let it cure for the recommended 24 hours. Then I closed up the camera and threw it into my bag as I went to work. After the work day, I opened the camera, and the liquid electrical tape had fused to itself, and it did a real number on the bellows as it peeled apart during the opening process.
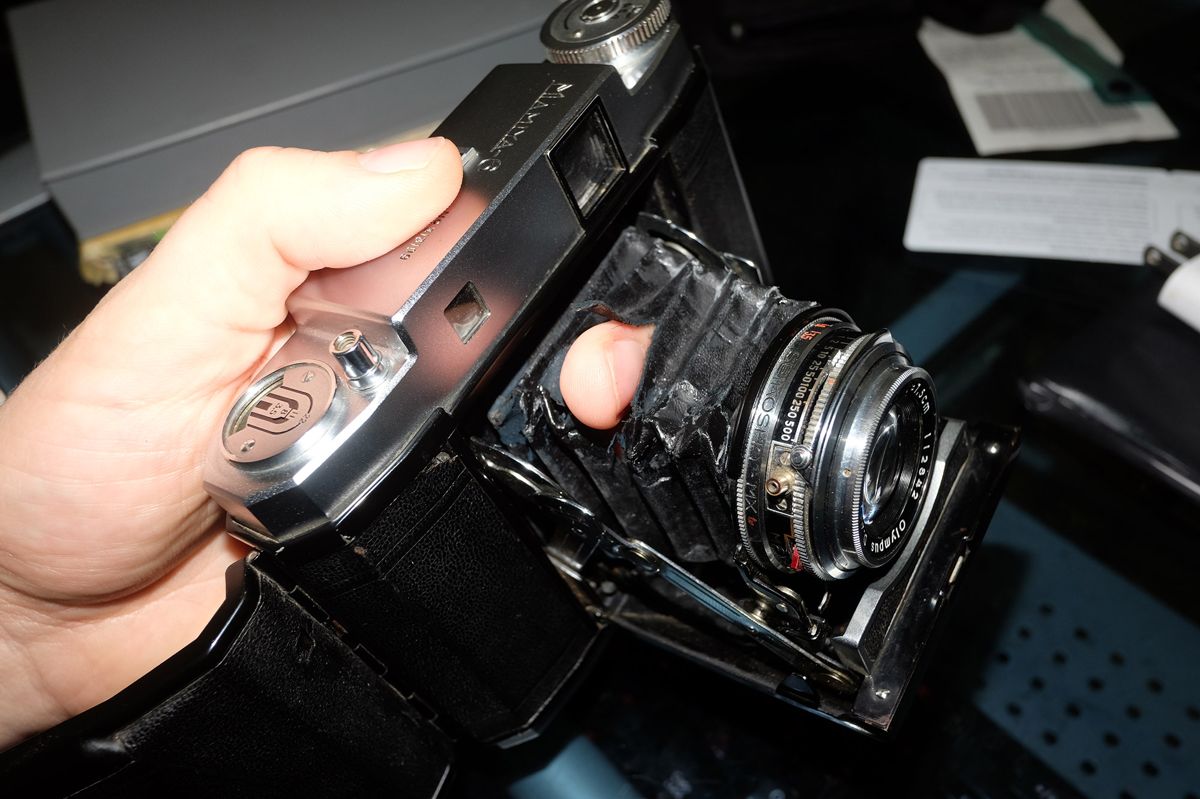
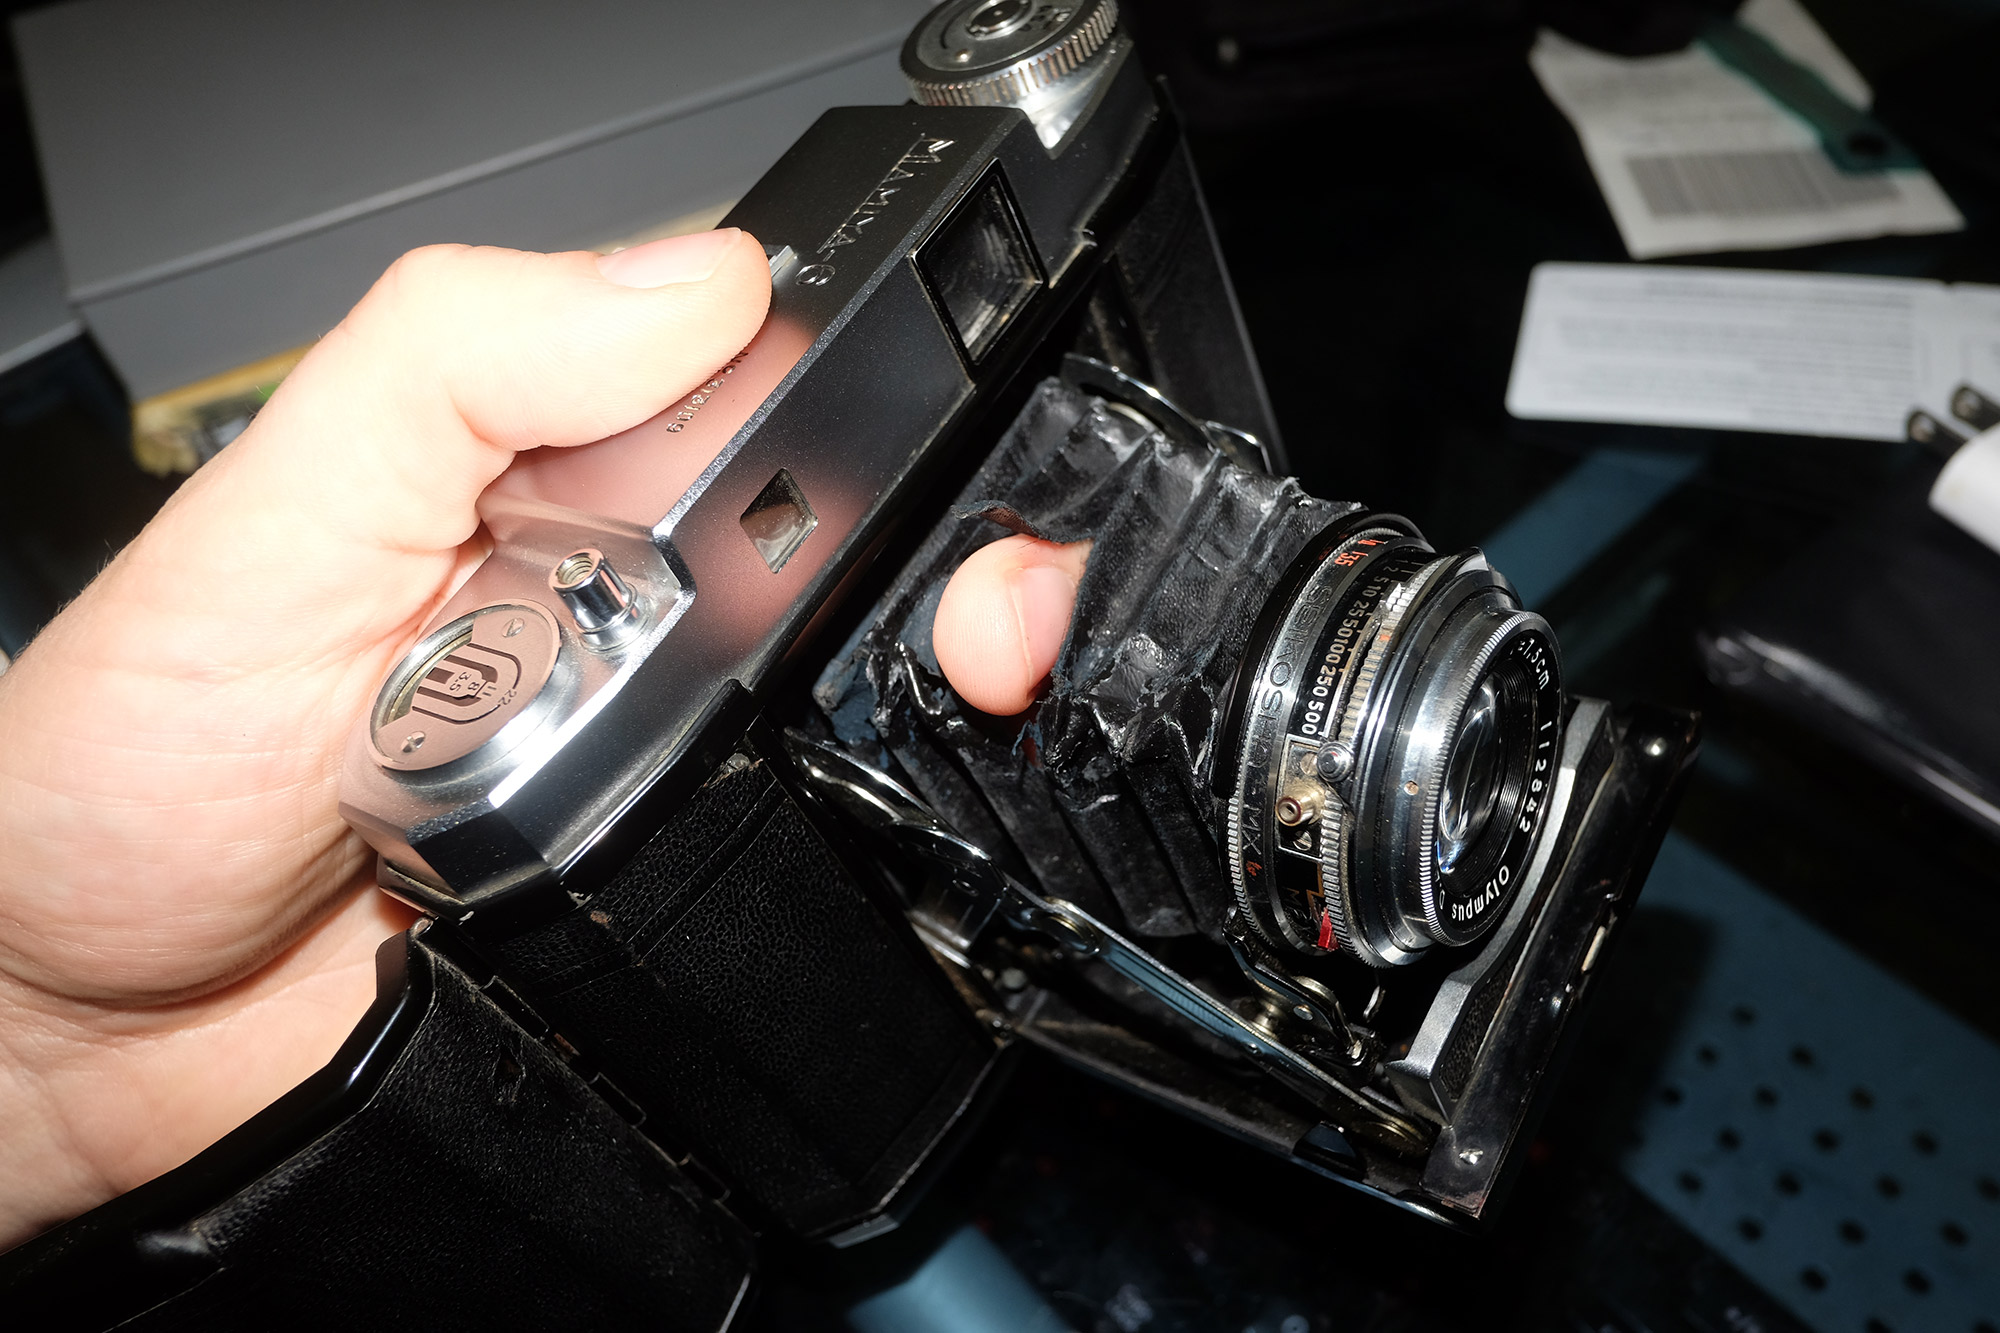
I claimed defeat and sent to the camera to Jurgen at certo6.com to get a new set of bellows installed. Patching is fine in a pinch when it works, but for old bellows near the end of their life, it always leaves that sense of dread not knowing when another one will appear. So I'm happy to pay the premium not to have to worry about when new holes will appear.
The camera came back with some sexy new bellows. Though there initially were some light leaks due to glue on some of the corners connecting to the body coming undone.
The Autococking Shutter
So the auto in automat apparently originates from a mechanism on the camera that automatically cocks the shutter as the user advances the film between exposures. This a neat feature that many medium format cameras lack. The problem with my particular automat though, was that for about two or three exposures per roll, something in the timing mechanisms would get our of whack. This glitch results in the cocking arm not returning to its resting position which would cause the shutter to either not be able to be fired. Or even worse, not let the shutter close after it opens.
When I noticed that this happened, it was easy enough to work around by starting to close the lens into the body. That motion would break the connection between the shutter cocking arm and the body. Then it could be moved out of that way and fired as normal. But then the camera goes back to needing to be manually cocked between exposures until the lens if fully closed and reopened.
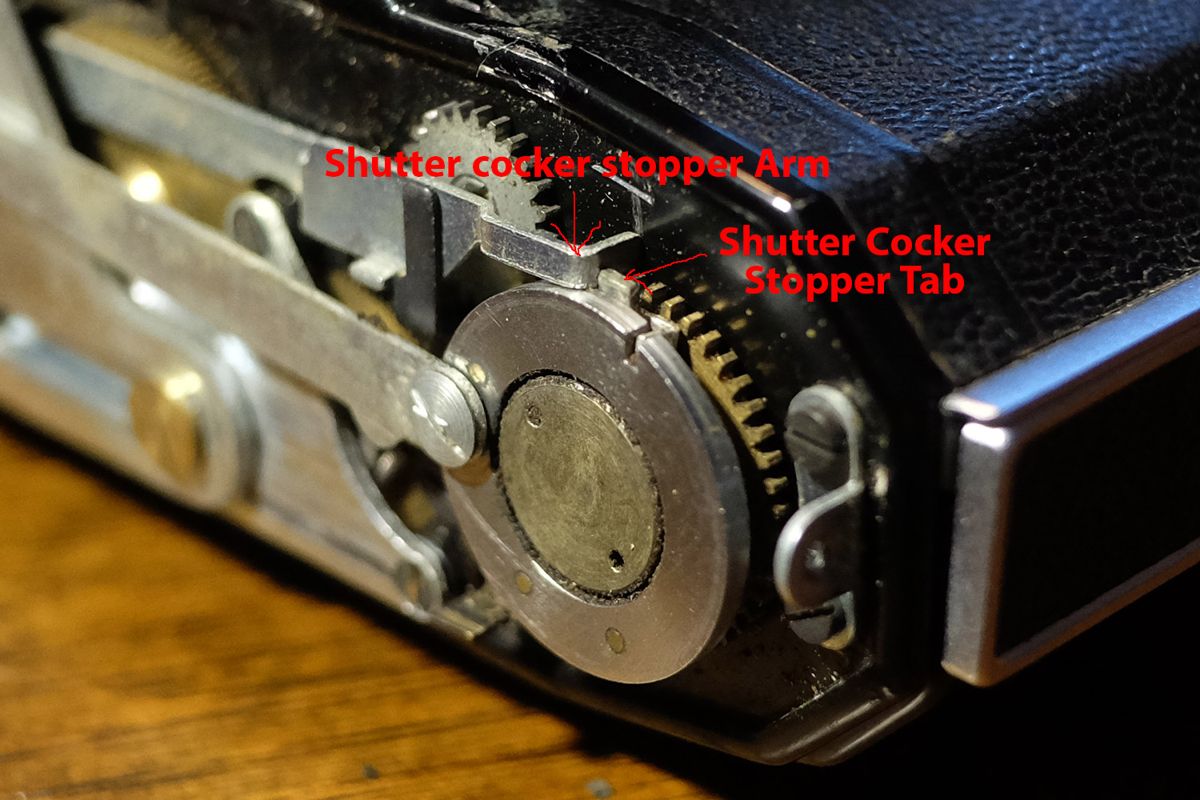
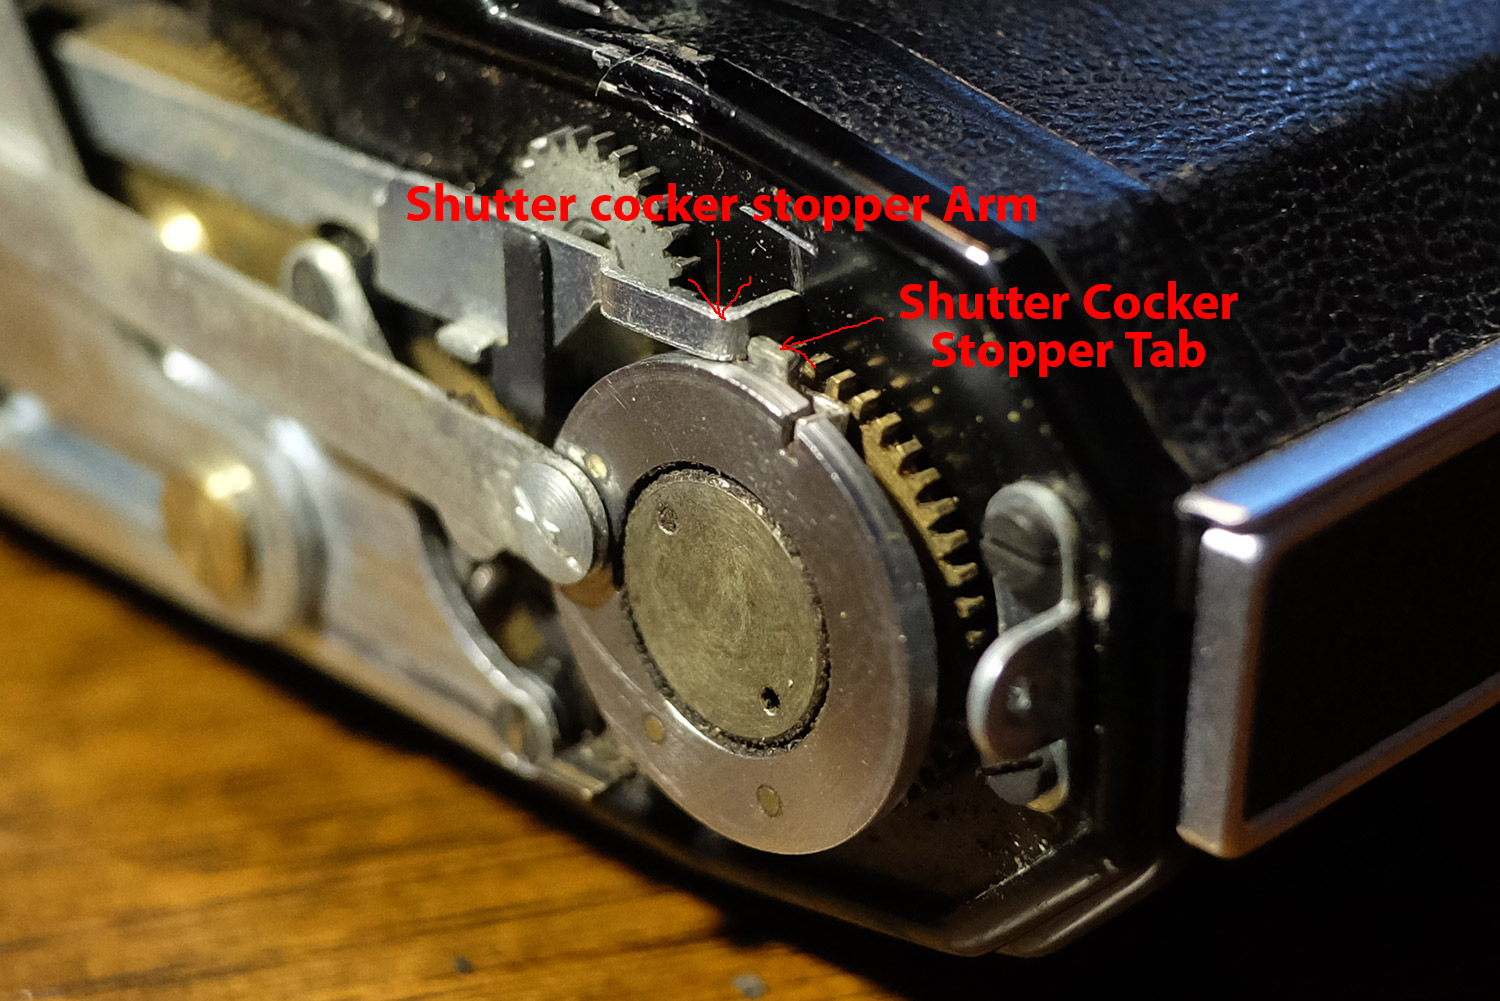
On a lark one night I took the top and bottom base plates off the camera and just watched everything move as I dry fired the camera over and over. Eventually, I noticed a little tab on a gear on the bottom of the camera that was associated with where the shutter cocking arm stopped.
This tab (Figure A) is supposed to connect with an arm that is connected to the shutter release button to stop the cocking arm from moving anymore after it did its job. However the arm wasn't fully resetting in my camera, so it wasn't stopping the tab every time.
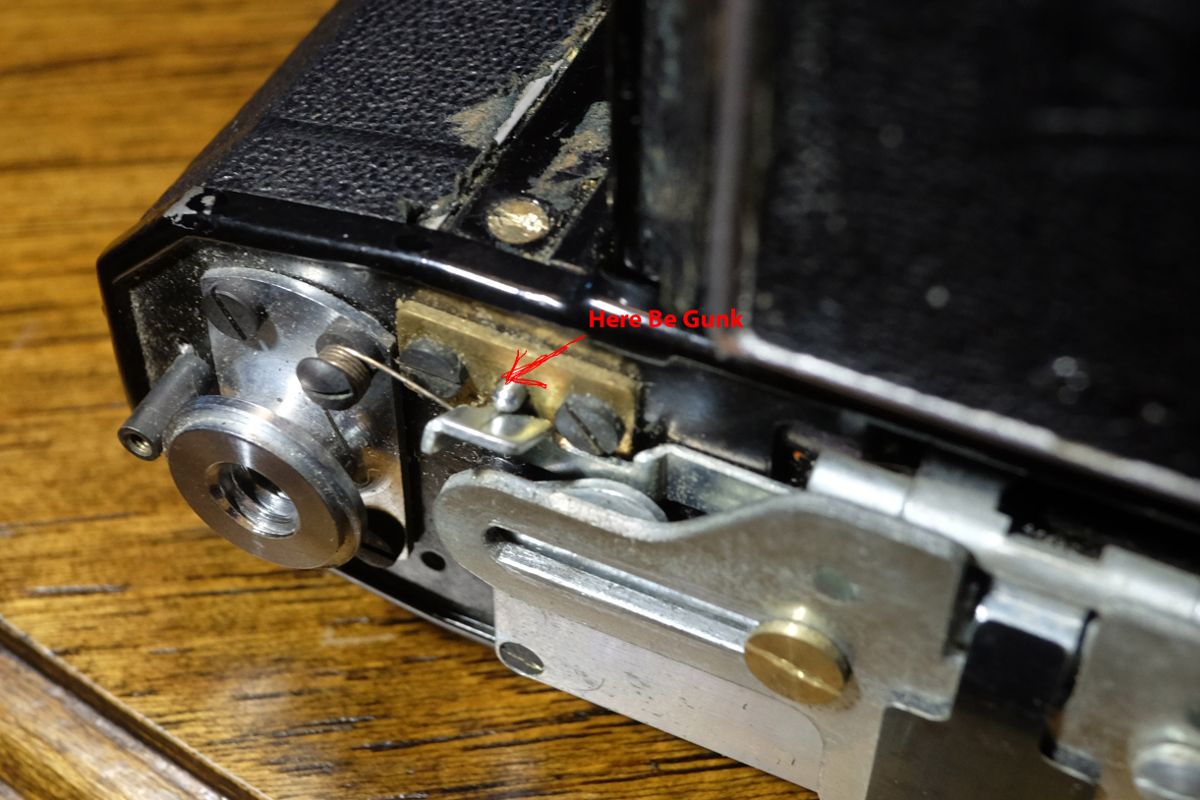
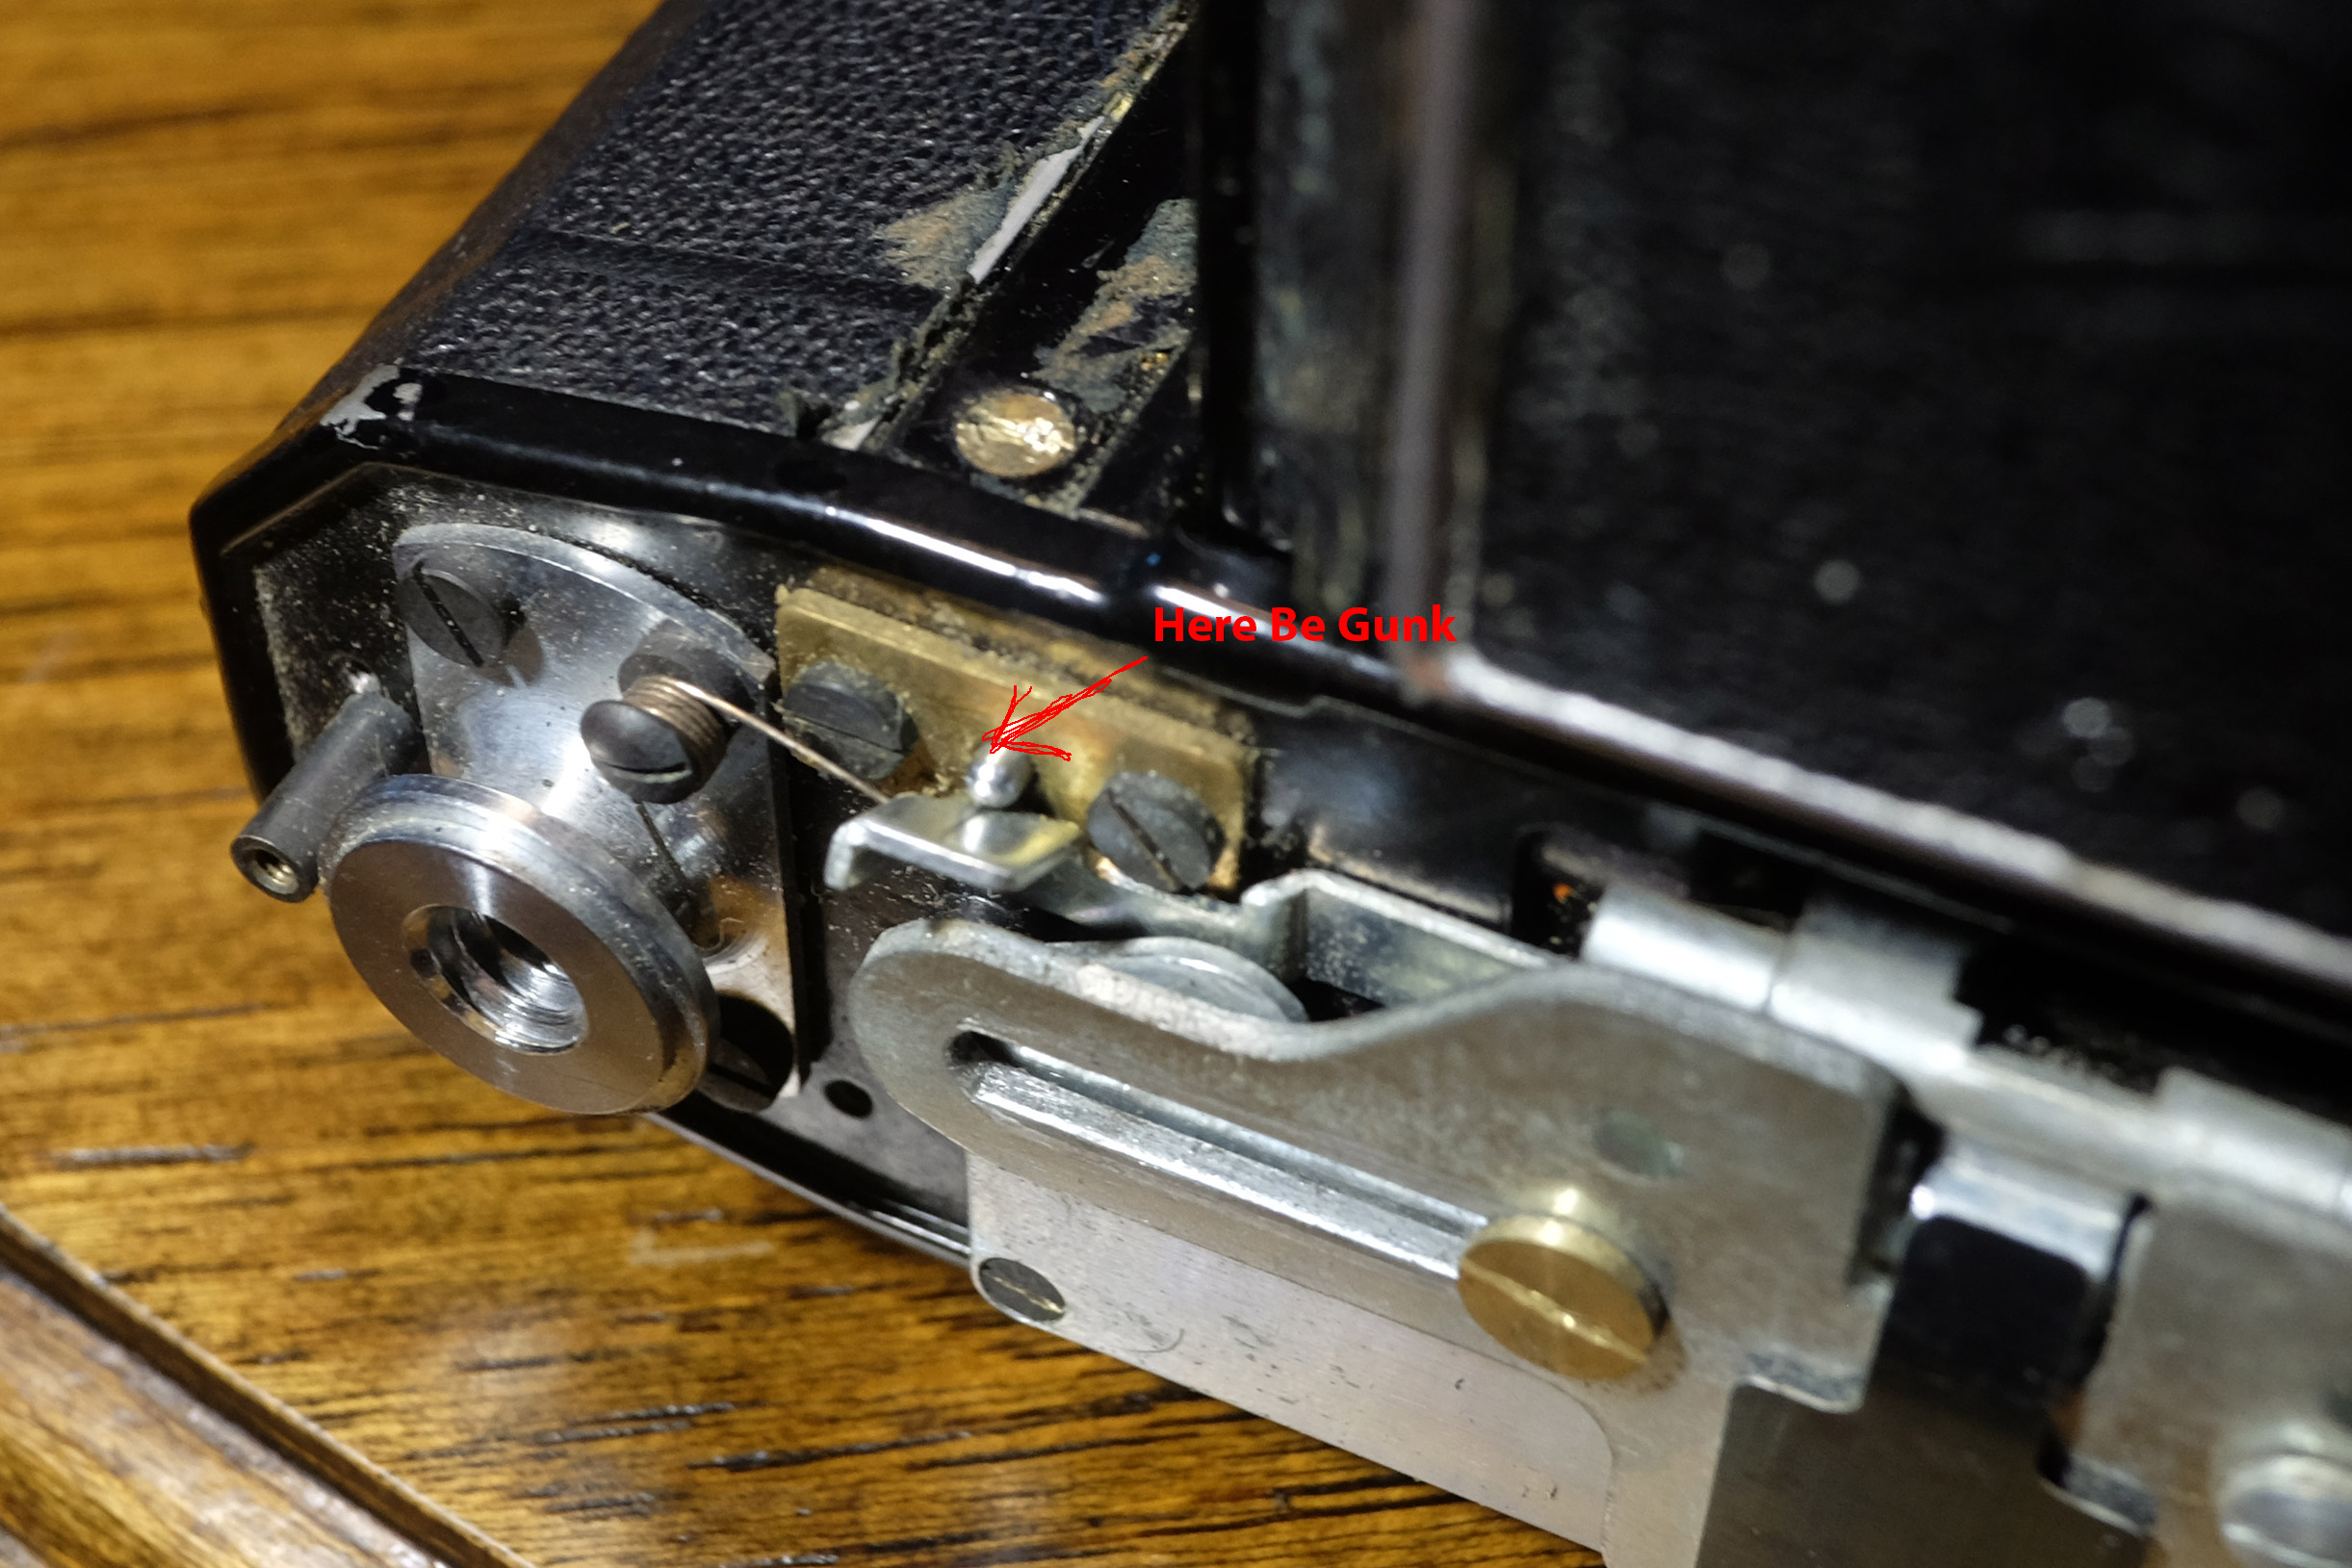
First, there was a lot of gunk built up around the pin that connects the shutter button and the arm that stops to the shutter cocker. (Figure B) I swabbed all this off with a q-tip dipped in rubbing alcohol to get the gunk off to let the arm and pin slide against each other cleanly.
Secondly, The shutter release button was twisted weird so that it was getting caught under the disc that shows how many meters the rangefinder is focused on. (Figure C) I suspect that due to this, the shutter was not able to fully reset, which cascaded down to the arm at the bottom of the camera not being able to connect with the shutter cocker stopper tab.
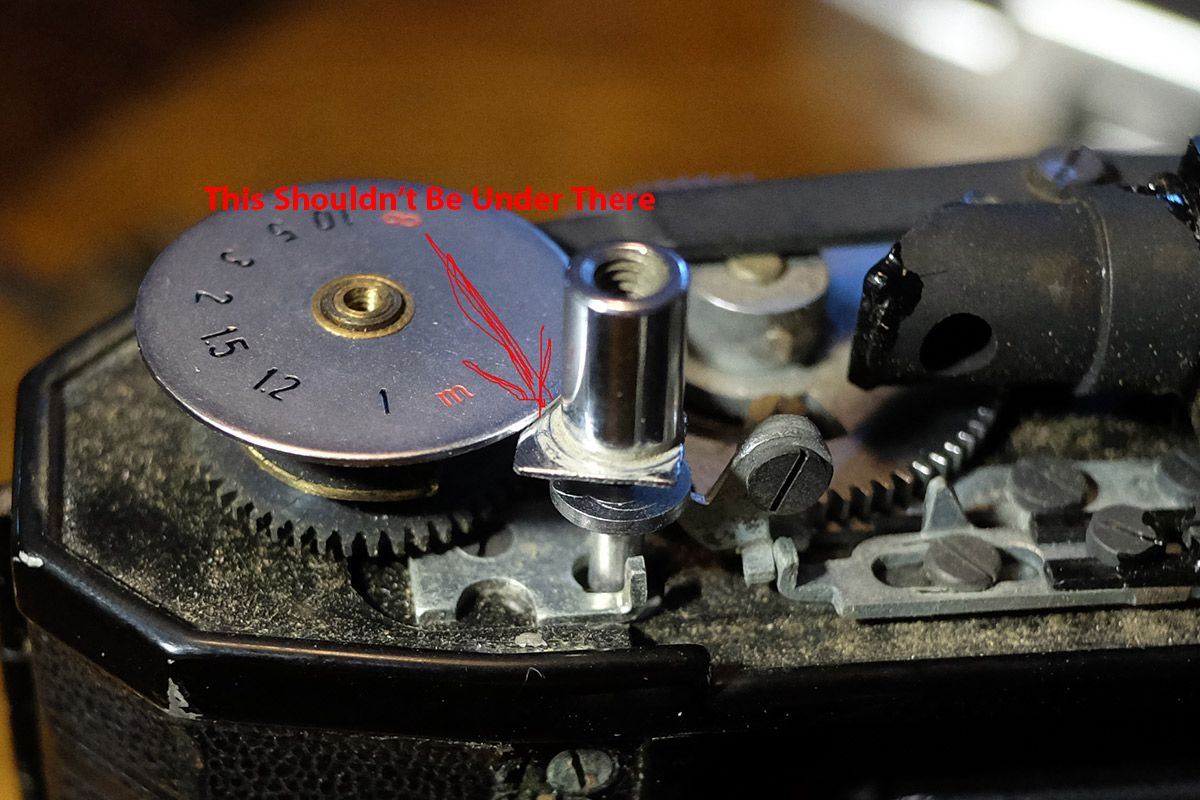
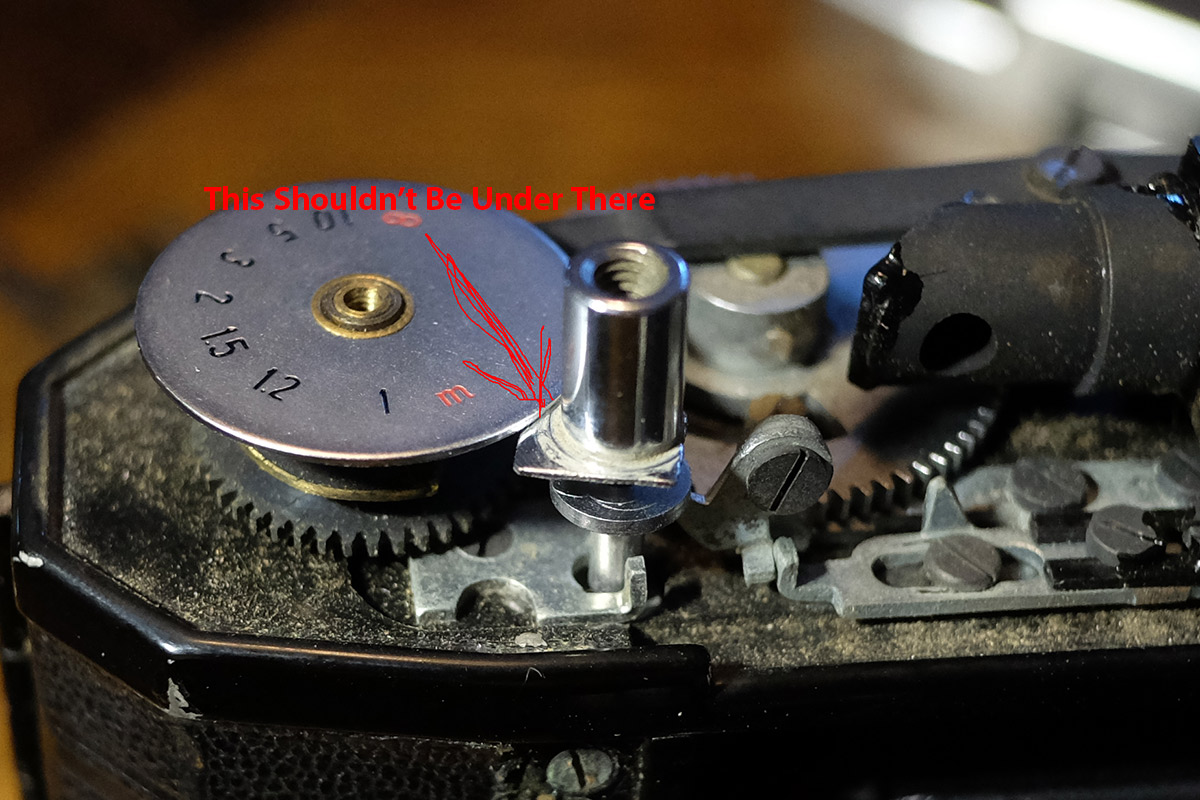
I simulated exposing about twelve rolls of film after making these adjustments, and the timing on the shutter cocking mechanism hasn't failed once. I hope that means I got it! ::knocks on wood::
Loading The Camera
I feel like every time I get a new medium format camera I end up goofing up the loading of the first roll of film somehow and ruining it. So for the Mamiya Six, I made a little video showing how to load it.
Two points of interest about loading and unloading the Mamiya Six. First, I find that when aligning up the start arrows with the start mark tends to put the film close to the lead edge of the film. If you are processing your film at home, this isn't an issue. However, I take my film to a lab for development and have found that the beginning of the film that always gets exposed when they load it into the machine creeps into the first frame. So, you may want to give the film an additional crank or two if you intend to have a lab do your processing.
Second, with the lick and stick seal that Kodak uses for their current 120 films, it sometimes seems to get hung up in the camera when winding up the rest of the roll. Sometimes attempting to advance the film will cause it to tear off, sometimes I won't. Small panic inducing feeling the first time it happens, but it doesn't seem to fog the film if you need to open the camera up to free the stuck film.
Removing The Top Plate
If you want to get into the camera to clean the viewfinder, or for other devious reasons, here is a video I made showing to remove the camera's top plate.
24 Archived Comments
I have a mint looking Mamiya Automat.
The camera operates as it should but I cannot make focused negatives and prints.
As the camera was CLA'd is their chance the back focus mechanism was adjusted improperly?
Any pics of just where the focus mechanism should be when set at infinity as even infinity focused pics are out!
Thanks for this write up and for the videos.
Hi. Great explanation, thanks!
I've just bought an apparently mint 1958 6 automatic. New bellows, pristine lens, beautiful body, but the film advance knob, while cocking the shutter and pulling film, just doesn't stop: I've just loaded my first film and wound it all to the take up spool without the camera ever stopping.
Should I check under the baseplate just as you did? Is there any other possible culprit?
Thanks.
Hi. Great explanation, thanks!
I've just bought an apparently mint 1958 6 automatic. New bellows, pristine lens, beautiful body, but the film advance knob, while cocking the shutter and pulling film, just doesn't stop: I've just loaded my first film and wound it all to the take up spool without the camera ever stopping.
Should I check under the baseplate just as you did? Is there any other possible culprit?
Thanks.
Hallo Frank How do you know a Mamiya 6 is type 1 or 2 , 1955 or 1958?
The 1958 Automat II (only made in 1958) has the Mamiya Sekor f/3.5, 75mm lens, a small plastic Mamiya badge on the upper left front face, and frame lines in the viewfinder.
Hi. Great explanation, thanks!
I've just bought an apparently mint 1958 6 automatic. New bellows, pristine lens, beautiful body, but the film advance knob, while cocking the shutter and pulling film, just doesn't stop: I've just loaded my first film and wound it all to the take up spool without the camera ever stopping.
Should I check under the baseplate just as you did? Is there any other possible culprit?
Thanks.
Flip the lever at the back, the one that puts the red flag away, to the left. That starts the film advance sensor and frame counter.
I have just acquired a Mamiya 6 Automat in (apparently) beautiful condition (almost mint). Can you tell me (to save wasting a film!):
(1) does this camera auto-wind (i.e. do I just wind on the knob after each exposure and it stops automatically at the correct place) or do I have to use the red window?
(2) how do I set the film speed indicator on the wind-on knob? (I realise it is just for information, but that's a useful reminder for me).
Thanks in advance. If you have any advice for testing, I would be grateful for any suggestions you have. It seems that manuals for this do not exist.
(1) It should auto wind and stop the film in the correct position after every frame. No need for the red window if everything is in working order.
(2) Don't recall off hand. Looking at my pictures I think you just use the little bumps to slide-rotate the dial into the correct place.
If you line up the film right when loaded, does the numbering through the back window stay in sync with the dial? I just got mine, and one matches with one, two with two, and then it starts stopping short of the numbers when looking through the window.
Honestly, I don't remember. Best bet is to just shoot a roll and see what happens with the frame spacing.
Does the Mamiya Six Automat show frame lines in the viewfinder.
No.
Hi Kip thanks for your reply regarding frame lines. When looking through the viewfinder how easy is it to view the scene, basically would you say the Mamiya Six had a descent viewfinder.
For cameras of the style, it is a rather nice, big and clear viewfinder. My only itch with it was that it always seemed like the negatives were slightly shifted from what I thought I had composed. Which would make sense as the viewfinder is off the lens axis if there is no parallax correction. I actually did shoot a few frames where I marked the corners of what I could see in the viewfinder to compare with where they ended up on the negative. Haven't scanned those yet.
Exactly what I experienced with my first role of film. I have to run my second role to see how much adjustment I need to make to correct more space on the right. Otherwise, the camera takes beautiful pictures.
So whatever happened after you marked the frames and got the negatives back?
How did you remove the top cover?
Rotate the film advance knob in the opposite direction that you would turn it to advance the film. It will unscrew loose revealing the screws you need to remove from the left side. Right side, start with the two screws that are visible. I think there are a few more underneath the plate that comes off first.
I don't think you need to touch any of the screws on the accessory screw.
Just taken delivery of one of these, thanks for the film loading video, I can shoot without a manual but the loading I wasn't so sure about! Does this camera have the same red indicator for the double exposure lock? Mine doesn't seem to have a double exposure lock at all, and no indicator in the VF. Also what do you mean about
" I find that when aligning up the start arrows with the start mark tends to put the film close to the lead edge of the film"
Thanks a lot!
" I find that when aligning up the start arrows with the start mark tends to put the film close to the lead edge of the film"
If I follow the guide arrow, this ends up putting the first frame close enough to the edge of the film that depending on how my lab loads it into their automated machine, the frame can be ruined by the light that hits the start of the roll. Not an issue if you are home processing and load in complete darkness.
The camera has built in double exposure protection. No red flag, but you just can't hit the shutter until the film is advanced.
So you mean a bit more film pulled through than standard, before you close the back? Forgive me being thick but at 3.45 in the vid the start arrow is just before the white dot which seems to be the opposite, hence my question. Will have to check mine out, if you manually tension the shutter you can press the shutter release button and it'll fire, over and over. I guess if you only used the automatic cocking then it is a sort of double exposure prevention. Mine has a couple of issues so I'll need to get inside it soon anyway.
Yeah. Manually advancing the shutter lets you keep doing double exposure. But that is tough to do accidentally.
I made the video before I got rolls back were the first frame were fogged, so the loading adjustment isn't in it. Not sure how my lab loads the film, but sometimes the exposed end is at the end of the roll, other times it is at the beginning. I just give it about an additional half turn after the arrow lines up and have been fine.